If you’re not ready to sacrifice your lawn for a veggie patch or you’ve simple run out of space, don’t despair, you may be overlooking some areas that can quickly be converted into food growing oases. Here’s a guide to how we use the paved areas around our home for growing food, it may give you a few ideas.

You can grow most veg in a raised bed.
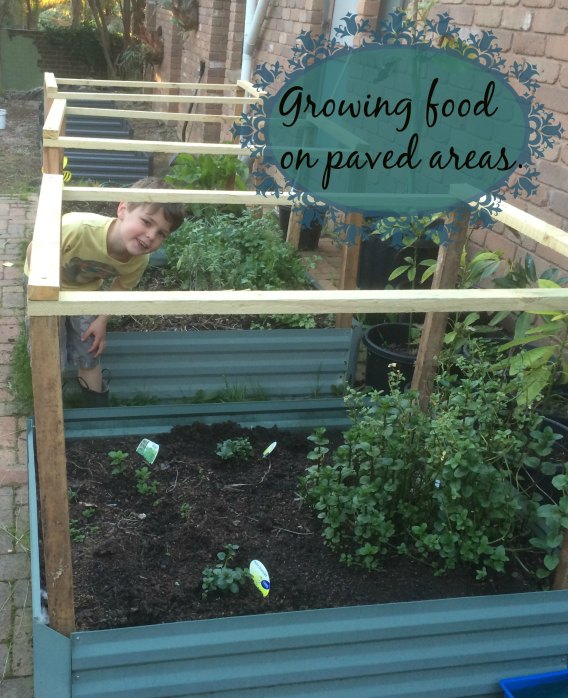
Our house can loosely be described as ‘ranch style’ and it is paved or gravelled all the way around. At the back of the house we have seven raised beds growing herbs and vegetables. Adding ready made raised beds is a really quick way to turn a paved area into a growing bed.
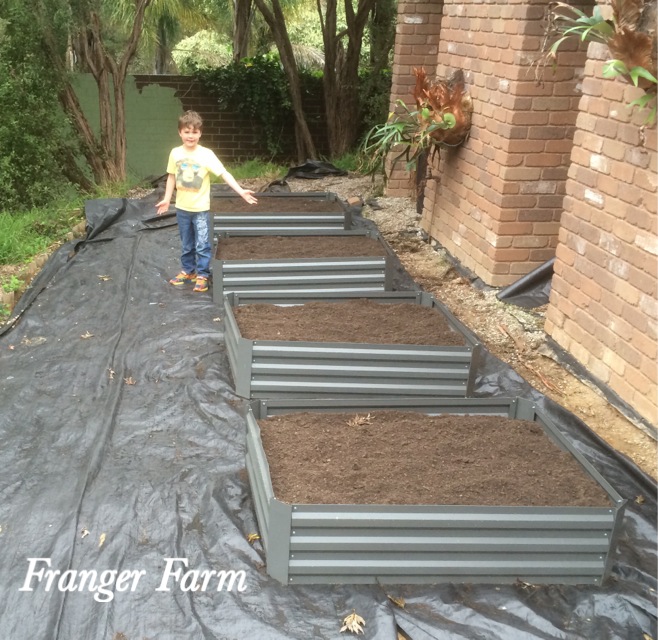
Adding some more raised beds at the back of the house.
When we added our latest beds, the area had been covered with weedy gravel, we took it back to dirt, then weed matted the entire area before placing the beds on top, our next job is to add some new gravel around the beds. As soon as the beds are filled with soil, they are ready for planting and they can be placed direct on to concrete or pavers. So you see how quick it is to convert a paved area without any major alteration and not a huge expense either.

Large pots are handy.
A few large pots can also be turned into an instant herb or vegetable garden, we have quite a few dotted round the place, they are great for use on balconies as well.
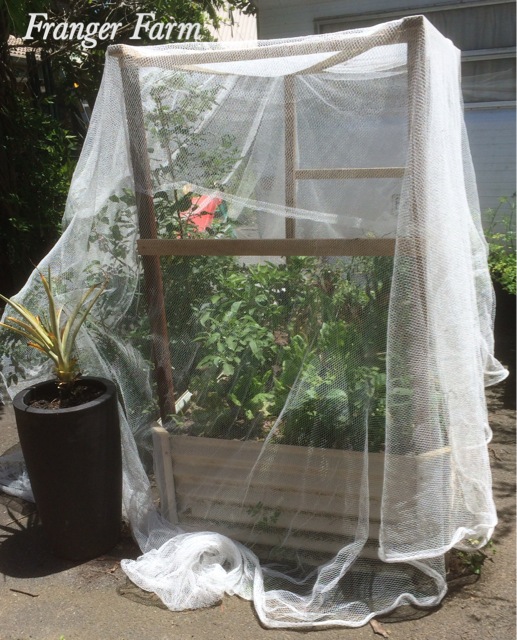
Make a frame for nets to keep pests out.
At the front of the house we have a large bed that is deeper than the others, this gives us more options when it comes to planting time. We’ve also added frames to some of our raised beds so that they can be netted to keep the pests out. It’s not essential to buy ready made raised beds, the same can be achieved with four pieces of wood joined together to form a bed, or with any large container such as an old apple crate.

Tomato plants in a raised bed.
As these beds are so close to the house, we like to use them to grow the things we use the most, like herbs and salad items, it’s so quick and easy to make a salad if you only have to step a few feet out of the door of your house to grab the things you need, and we never have to trek to the supermarket to pick up fresh herbs.
So take another look at the areas around your home, maybe you have got space to grow some food after all?